Frank Body Original Coffee Scrub.


Frank Body Original Coffee Scrub* – £11.95.

I am a little bit slow on the uptake with this one as I have seen a number of rave reviews flying around the blogosphere over the months and I’ve read that it is a skincare saviour, ready to battle all of our skincare woes. This coffee scrub is set to tackle many skincare problems from eczema to psoriasis to acne and even stretchmarks. Sign me up! I have been trialling this brown paper bag of wonder and goodness for the past few months and I believe that I am ready to give my ten pence worth. Frank Body kindly sent me their original coffee scrub and luckily, I adore the smell of coffee but if you don’t, you can order Coconut, Cacoa or Peppermint. Something for everyone and they all sound lush.

  
This coffee scrub is a completely natural product containing ingredients such as; coffee (obviously), sweet almond oil, water, salt, brown sugar, orange oil, vitamin e and natural fragrance. I have been using it as an all over body exfoliator, including my face. I find the best and least messy (and boy, this stuff is MESSY I might add) way of applying this coffee scrub is by wetting your entire body in the shower, turning the shower off and then rubbing around two handfuls of the scrub all over my entire body. I then leave it for 5-10 minutes before rinsing it off. It is rather abrasive in texture so I would strongly recommend using light circular motions to get the circulation going and to help exfoliate the skin, removing dead skin cells. I have been using the Frank Body scrub twice a week for quite some time now and my skin has become so unbelievably smooth and the skin on my face, which is prone to breakouts, is a lot smoother than before. I’d mark those down as two major successes for Frank Body’s Original Coffee Scrub. However, the stretchmarks didn’t really disappear or reduce so I’m not sold on those claims unfortunately. 

The packaging I quite  like, a very original yet simple brown paper bag with another plastic bag inside which closes by a zip lock and houses 200g of dry coffee scrub. It does need to be stored in a dry place which means carting it back and forth from my room whenever I need to use it which isn’t ideal but hey ho. I would definitely repurchase this and try the other scrubs as it has done wonders for my skin – it’s smoother, less red and congested and definitely clearer. The only major downside is the mess, it creates A LOT of mess and wastage but it works really well and we can’t have it all now, can we? I have to give Frank Body a big pat on the back for their marketing skills – I love their quirkiness and they have great (and slightly risque) sense of humour.

   SHOP FRANK BODY.

Have you tried any products from Frank Body?


*PR Sample.

Monthly Manicure – Shellac Lost Labyrinth.


The latest instalment in the monthly manicure series is this beauty that I had done in my local salon at the beginning of April. It is one of my favourite shellac colours for sure. This gorgeous vibrant blue shade with a stunning iridescent shine is called ‘Lost Labyrinth’ and it is bloomin’ fabulous. I’ve never had so many compliments on my nails than when I’ve been wearing this shade. It is perfect for Spring – it’s bright, it’s noticeable and it makes my hands look super tanned. As I always do, I opted for some glitter on the accent nail in a matching shade. I love it. 

What do you think of this month’s manicure?


Homemade Cinnamon and Buckwheat Granola.

There’s something a little bit different on my blog today, a recipe. If you are a regular reader of my blog or if you follow me on social media, then you will know that I am trying to lead a healthier lifestyle and eat a lot cleaner. So far I have lost 12lbs in weight and counting through doing so and I am feeling great so I am documenting my journey. When it comes to breakfast, I love nothing more than a bowl of crunchy granola but most shop bought granola is jam packed with sugar and although you may think it is a somewhat healthy breakfast, it really isn’t (even if it does contain fruit). This weekend I set about making my own granola using buckwheat and it was a triumph and it tasted pretty damn good.
Ingredients:

2 cups of jumbo rolled oats.

1 cup of uncooked buckwheat groats.

1 cup of desiccated coconut.

1/2 cup of almonds.

1 cup of raisins.

3 tbsp of chia seeds.

3 tbsp of flaxseed.

1 tbsp of ground cinnamon.

6 tbsp of coconut oil.

1 pinch of salt.

6 tbsp of honey/agave nectar.

1/2 cup of goji berries.

1 cup of raw cacao nibs.

Method:

1. Pre-heat oven at gas mark 4  (175c).

2. Add jumbo oats, buckwheat groats, desiccated coconut, almonds, cacao nibs, raisins, chia seeds, cinnamon and flaxseed in to a large bowl and mix together.

3. Add 6 tbsp of coconut oil in to a pan and melt on a low hear.

4. One melted, pour the coconut oil over the granola mixture and stir it all together.

5. Add a pinch of salt.

6. Place mixture in to a baking tray and place in the oven and cook for 20 minutes.

7. Take the granola mix out of the oven, stir it and place it back into the oven for a further 10 minutes.

8. Take mixture out of the oven add 1/2 a cup of goji berries and 5 tbsp of honey/agave nectar.

9. Leave mix to cool down and crisp up. 

10. Serve with natural yoghurt and/or fruit.


I prefer to eat mine with some natural yoghurt and honey or with some pomegranate seeds. It tastes absolutely delicious. This recipe makes around 10 servings of 35-40g.


Enjoy!

Let me know if you make it, I look forward to seeing your results. You can tag me on a Twitter and Instagram (@erinlouisehunt) too if you like.


Monthly Manicure – Shellac Beckoning Begonia / Butterfly Queen.


It’s been a while since I’ve done one of these posts, hasn’t it? I know that I’ve totally neglected my blog of late as I have been more focused on trying to get fit and healthy but I’m back in the blogging game and hoping to get back in to the rhythm of posting regularly again. This was actually March’s manicure (this is how behind the times I am guys – sorry) and I will be posting April’s shortly. As we entered Spring, I wanted something that was a little softer and more girly than what I’m used to. What better way to start than with a Shellac nail polish called ‘Beckoning Begonia’? A gorgeous pale pink-lilac with an subtle shimmer. Naturally, I opted for something a bit different, brighter and more glittery for my accent nail and went for the shade ‘Butterfly Queen’ which is also quite an apt name for Spring, dontcha think? 

What do you think of this nail combination?

Bloglovin’ | Twitter | Instagram | Pintrest | Google+


L’Oréal Infallible 24H Matte Foundation.


L’Oréal Paris Infallible 24H Matte Foundation in Vanilla – £6.99.

Drugstore foundations have seriously upped their game lately and this new offering from L’Oréal seriously rivals a lot of my favourite high end foundations. Big claim I know but hear me out, okay? It’s been a long time since I bought in to the hype surrounding a high street foundation and actually got excited about it but I’m glad that I gave this one a go. I have read countless rave reviews and I was definitely sold by the ’24H Matte’ claims as a girl that suffers horrendously with oily skin and a greasy face, matte is my best friend. I have never been able to find a foundation that caters to my skin’s needs but with a friendlier price tag than the foundations that I’m used to buying (Estée Lauder, I am looking at you). Whilst perusing Boots a few weeks back, I finally got to swatching and settled on the shade ‘Vanilla’, with the help of my trusty sister. I can never trust my own eyes in a department store. I’m sure you know how it is… Luckily, Vanilla was the perfect match for me as I have gotten a little paler over the last few months but hey ho. L’Oréal’s Infallible 24H Matte Foundation is a medium to full coverage foundation with a matte finish (like the name didn’t give that away eh?) and I have to say that it leaves the skin looking absolutely flawless. The foundation is housed in a pretty basic, no frills, squeezy tube but d’ya know what? I kinda like it. It is, effective, simple and it is easy to control exactly how much foundation you need/want to use. I have been squeezing the foundation out on to the back of my hand and applying with a Real Techniques stippling/expert face brush, it applies like a dream and it is effortlessly buildable to give you the desired look, coverage and finish. I usually use around two pea sized blobs, one after another, covering my entire face in circular motions and it covers the redness in my cheeks and my skins imperfections like a dream without looking remotely cakey. Now this foundation claims a massive 24 hour wear time – I’d like to know who wears their foundation for 24 hours? Come on now, own up guys! I have put L’Oréal’s Infallible Matte Foundation through it’s paces over the past few weeks to test the staying power and longevity and it ain’t half bad. I get a decent amount of wear throughout my working day in a heavily air conditioned, huge glass building – I’d say I get a good 4-5 hours before I need a touch of blotting. By the end of the working day, it still looks pretty darn good, almost perfect. No complaints here on the duration front – it holds up well by my standards. It withstands a decent amount of humidity and it stays intact when I go to the gym straight from work. Yes, you read that right. This foundation is ideal for those with normal – oily skin as it offers great coverage, staying power and a stunning matte finish but a word to the wise for the dry skinned ladies, stay well clear. If you have any patches of dry skin, this stuff will accentuate it and cling to it for dear life so avoid it like the plague. Other than that, the only downside for me is that the colour range is quite limited but I find that issue with most high street foundations. I have to applaud L’Oréal for bringing this foundation to the shelves nationwide as it is pretty close to perfect and it is much more purse friendly than the foundations I’m used to retailing at only £6.99. My bank balance is pleased.

Have you got round to trying this foundation yet? 

SHOP VIA BOOTS.

Bloglovin’ | Twitter | Instagram | Pintrest | Google+


My Clean 9 Journey.


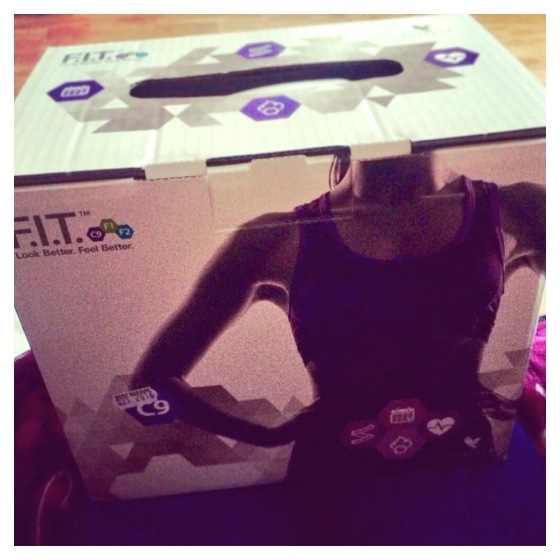
Forever Living Clean 9* – £114.70.

Some of you will have noticed that I have been somewhat absent from the blogosphere for the past month or so, and I am happy to tell you that I am back. Since January, I have been putting a lot of my time and effort in to getting fit, in shape and healthy – I joined a gym, I attend several gym classes a week, I started running again after 10 years, I found a real love of spinning and most recently, I went on a pretty intense 9 day cleanse. I put on a lot of weight in a really short period of time and I am trying to shift it whilst trying to lead a healthier and more balanced lifestyle. If you follow me on Instagram then you will have seen me posting wild and taking you all with me on my fitness/weight loss journey. A friend of mine has recently started her own business selling Forever Living products and after seeing how incredible she looked after her Clean 9, I obviously wanted a piece of that action. 

What is Clean 9 I hear you ask? Well, I’m here to talk you through my personal journey…

Clean 9 is essentially a cleanse that lasts for 9 days (the name says it all, right?) and it helps to cleanse your body of toxins whilst transforming the way you eat and exercise, helping you to make better choices when it comes to food. It builds the foundation of feeling and looking better by promoting a healthier and more balanced lifestyle.


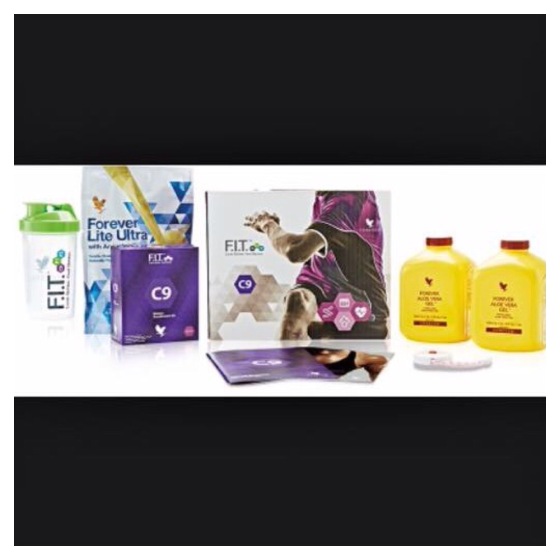
Each Clean 9 pack contains:

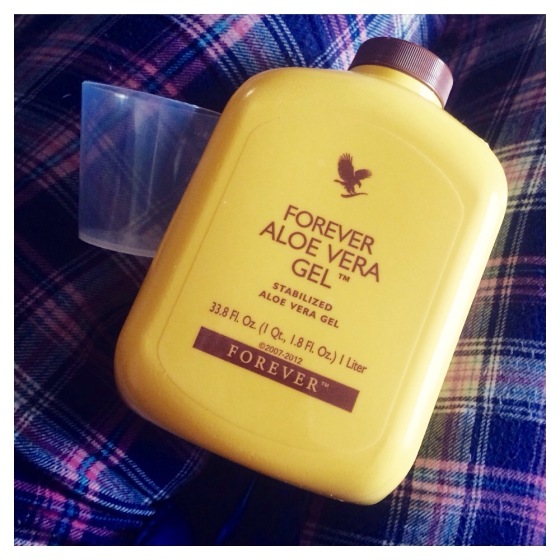
2 x 1 litre bottles of Forever Livings best-selling Aloe Vera Gel.

15 x Forever Lite Ultra with Aminotein (Chocolate or Vanilla) servings.

18 x Forever Therm tablets.

54 x Forever Garcinia Plus soft gel tablets.

9 x Forever Fibre packets.
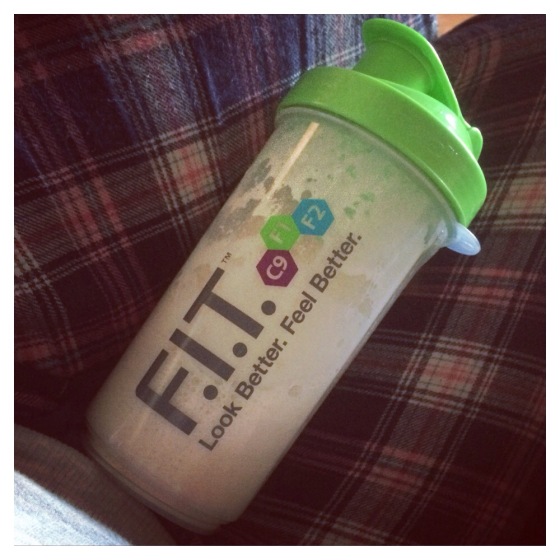
1 x Shaker.

1 x Tape measure.

1 x Daily diary/information booklet.


I’m going to break this down in to days for you to show you exactly how it works.

Days 1 and 2:

In my opinion, the first two days are without doubt the hardest. During the first two days of the cleanse, you don’t eat any meals whatsoever. Crazy, right? That’s what I thought and hey, I love my food. I decided to start this on a weekend but you can start on any day that suits you. I find weekends are the days where I tend to eat less food naturally so this would’ve been easier for me. I eat most when I’m in work, sat at my desk and bored to tears. My first two days on Clean 9 looked like this;

08:30am – Day 1 measurements – weigh in and all over body measurements.

09:00am – 2 shots of Aloe Gel, 2 Garcina Plus soft gels and 1 Therm tablet.

11:00am – 1 Fibre packet.

12:30pm – 2 shots of Aloe Gel, 1 Lite Ultra Protein Shake with 250ml unsweetened almond milk, 2 Garcinia Plus soft gels and 1 Therm tablet.

02:00pm – 1 Apple.

05:00pm – 2 shots of Aloe Gel and 2 Garcinia Plus soft gels.

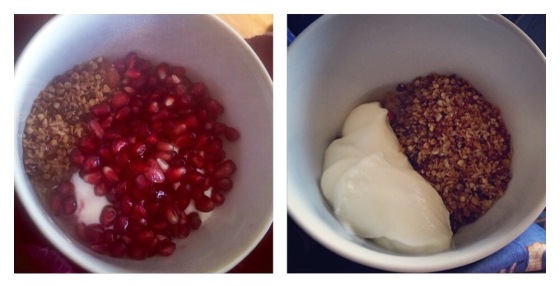
07:00pm – 1 Handful of red grapes, blueberries or stawberries.

08:00pm – 2 shots of Aloe Gel and 30 minutes of low intensity exercise.

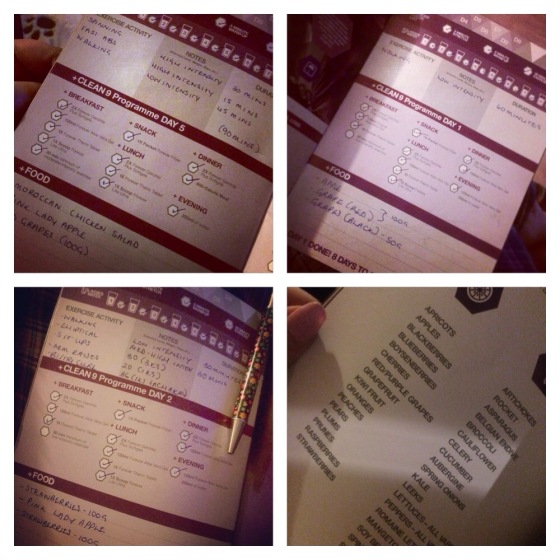
Throughout the day, you must drink a minimum of 2 litres of water and you need to do 30 minutes of exercise. In the diary that you get in the pack, you log all of the food that you have eaten and tick off when you have had all of your suppements, water, shakes and gel. It makes it easier to track your progress. You are allowed to eat certain fruits and vegetables in moderation from the free foods list during the whole Clean 9 process.

 (I chose the Vanilla flavoured shakes by the way and they are delicious.)

Word of warning: The Aloe Gel tastes pretty bad so prepare yourself for that BUT I can assure you that you definitely get used to it so don’t let that put you off. Let’s face it, we’ve probably drank much worse in our time.

Days 3 to 8:

Now this is where the cleanse was a little kinder to me. Throughout days 3 to 8, you are allowed to incorporate a balanced 600 calorie meal either for your lunch or dinner. I swapped and changed this about depending on my shifts at work to ensure that I didn’t get hangry (hungry-angry) because let’s face it, nobody wants that. After the first 2 days being so intense and incredibly tough, the rest seemed to be manageble and definitely doable. I’d cut out caffeine and went completely cold turkey before the cleanse and despite expecting to feel absolutely horrendous, I felt fine. I was less bloated and felt much better in myself. Caffeine and my beloved Diet Coke is a big no-no on Clean 9. Days 3 to 8 on the cleanse looked like this;

08:30am – Day 3 and 6 – weigh in days and all over body measurements.

09:00am – 2 shots of Aloe Gel, 1 Lite Ultra Protein Shake with 250ml almond milk, 2 Garcinia Plus soft gels and 1 Therm.

11:00am – 1 Fibre packet.

12:00pm – 1 Apple.

01:00pm – 2 Garcinia Plus soft gels, Grilled Chicken and Avocado Salad and 1  Therm.

04:00pm – A handful of red grapes, blueberries or strawberries.

06:30pm – 1 Lite Ultra Protein Shake with 250ml unsweetened almond milk and 2 Garcinia Plus soft gels.

07:30pm – 30 minutes of medium intensity exercise.

Again, a minimum of 2 litres of water is needed each day. Ideally on days 3 right the way through to the end of day 9, you should be taking the Garcinia Plus tablets 30 minutes before food and the Therm tablet after food – this helps to break down any bad fats. During this time, I was dragged out to dinner three times and each time whilst everyone was ordering burgers, I was ordering a salad. Willpower or what? I exercised willpower that I didn’t even know I had. I was super proud of myself. Go me!

The final day… Day 9:

My favourite day of all, the end is in sight. On the last day you are allowed to incorporate another meal of 300 calories whilst still having your 600 calorie lunch and you drop one of the shakes. Obviously the same rules apply with drinking water and 30 minutes of medium intensity exercise. I was apprehensive of doing so much exercise with so little food on board but I was pleasantly surprised by just how energised I felt. Weird, huh? So what does day 9 look like?

08:30am – Final weigh in day and final all over body measurements.

09:30am – 1 Lite Ultra Protein Shake with 250ml unsweetened almond milk, 2 shots of Aloe gel, 2 Garcinia Plus soft gels and 1 Therm tablet.

11:00am – 1 Fibre packet.

1:00pm – 2 Garcinia Plus soft gels, Quinoa Salad with chicken and peppers and 1 Therm tablet.

02:30pm – 1 Apple.

5:00pm – 1 piece of rye bread with Lightest Philadelphia Cheese and 2 Garcinia Plus soft gels.

07:00pm – A handful of red grapes, bluberries of strawberries.

08:00pm – 30 minutes of medium intensity exercise.


So the question on everyone’s lips, how did I do?

Very well indeed. 


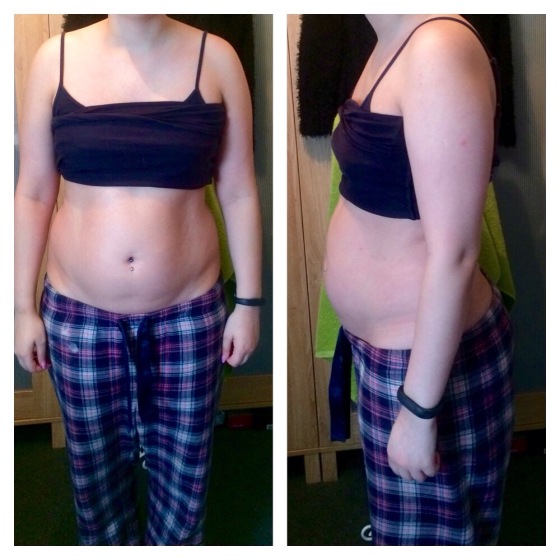
Starting Weight: 67KG/10.6 Stone.

Chest: 34 inches. 

Biceps: 10 inches.

Waist: 31 inches.

Hips: 37.5 inches.

Thighs: 21 inches.

Calves: 14.5 inches.


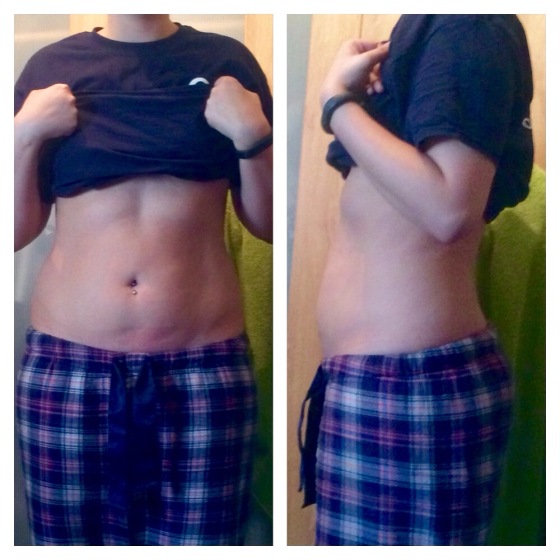
End weight: 65KG/10.2 Stone.

Chest: 32.5 inches.

Biceps: 10 inches.

Waist: 30 inches.

Hips: 36 inches.

Thighs: 21 inches.

Calves: 13.5 inches.


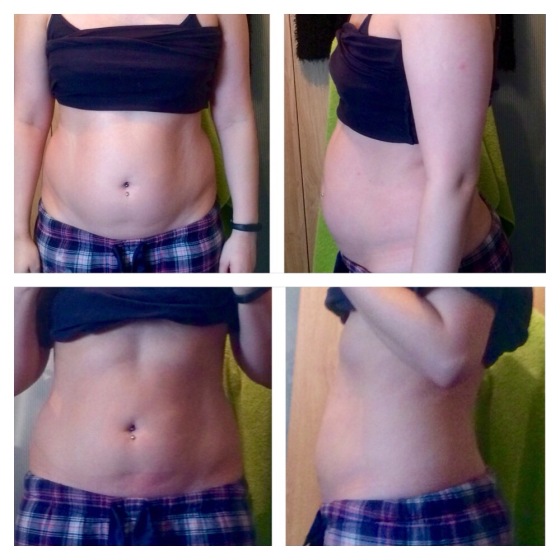
Loss: 2KG/4.4lbs and 5 inches all over.

What a success? I’m not normally one to buy in to fad diets and I tend to avoid juice cleanses like the plague but this one was different and I am glad that I did it. Not only have I lost weight AND inches but I have kicked Diet Coke and caffeine to the curb (something that I have tried to do countless times and always failed) and I actually enjoy eating salad which I never have done before. My cravings for junk food have also subsided which is always a good thing. I frequently checked My Fitness Pal and the Jawbone UP24 app to see the nutrional value of what I was putting in to my body scored really highly which I was really impressed with. Like with all cleanses and diets, I was keen to see what would happen once it ended and I started to eat normal foods again (by normal I mean not just salad) and so far, a week on, I have maintained the loss and not put any of the weight back on. Happy days! I still have a long way to go until I am happy with my body but I’m over the moon with the results so far. My weight had plateaued for a while and this has kickstarted my body back in to losing mode. Now I’m not saying that this cleanse is for everyone as everybody is different but it worked wonders for me – I feel slimmer, healthier, fitter and my skin is noticeably clearer and more radiant. I will be doing it again in the Summer for sure!

If you want to give it a go then you can check it out HERE – there is 10% off the RRP with the discount code ‘ERIN’.

Have any of you ever tried Clean 9 before?


La Roche-Posay Serozinc.


La Roche-Posay Serozinc* – £8.50.

I finally have my hands on the much coveted Serozinc, at last. Hallelujah! This product has achieved massive amounts of hype in the beauty blogging world but couldn’t be purchased or sourced in the UK sadly, well until just recently that is. A few months back I received a very exciting invitation to the launch off La Roche-Posay’s Serozinc in the UK and I was incredibly excited. Unfortunately it was in London and I couldn’t attend but I was still  absolutely over the moon to finally be able to try it though, see what all the fuss was about for myself. Serozinc is essentially a facial mist toner that feaures zinc sulphate amongst other wonderful ingredients which helps to soothe irritated skin whilst making it appear more mattified and less greasy/shiny. It is part of La Roche-Posay’s Effaclar range (which if you read my blog regularly, you’ll know that I love this range) and it is specifically designed for those of us with oily and blemish prone skin. My skin is an absolute nightmare as I am often prone to hormonal breakouts and it is oily beyond belief so I could wait to try Serozinc. I have always adored La Roche-Posay and their fabulous products – they always work wonders on my problematic skin and they feature regularly in my skincare routines. I have been using Serozinc religiously ever since it landed on my doorstep, once in the evening and once in the morning after cleansing but before using serum and/or moisturiser. I personally like to spray Serozinc directly on to my face, leave it to sink in for a few minutes before patting my face dry with a cotton pad but you can spray it directly on to a cotton pad and swipe it over your face if you like… Whatever floats your boat. I found Serozinc to be very refreshing and soothing and I have thoroughly enjoyed using it. You better believe it when I say that this is worth every little bit of the hype that it has received. Since using La Roche-Posay’s Serozinc, my skin appears much healthier, clearer and a hell of a lot less shiny. It is ideal for purifying the skin and it is perfect for helping remove those pesky breakouts. My skin is naturally quite red in appearance, especially across my cheeks and this really helped to reduce that too. Overall, this has turned out to be a little bit of a godsend and a true wonder product in my skincare arsenal. In a nutshell, it reduces redness, clears, soothe and mattifies skin, refreshes your appearance… What more could I want from a toner? This is definitely one to be repurchased.

Have you tried Serozinc? Do you believe the hype?

SHOP LA ROCHE-POSAY VIA ESCENTUAL.

*Escentual currently offer up to 1/3 off French Pharmacy brands*


*PR Sample.

Illamasqua Embellished Eye Trio.


Illamasqua Embellished Eye Trio – £49.00.


This is another absolute bargain that I managed to snaffle up in the amazing Illamasqua sale a month or two ago. It was reduced from £49.00 to £24.50 – inredible or what? I was bloody gobsmacked I tell you. I absolutely adore Illamasqua (and their sales, obviously), they are a fantastic brand with fantastic products that really speak for themselves. They are bold, larger than life and amazing quality. I had my beady eye on this trio for quite some time and I was over the moon when I saw it in the sale. The Embellished Eye Trio consists of three of Illamasqua’s cult eye products, all housed inside cute glass jars with gorgeous rose gold lids embossed with the Illamasqua logo. The gift box that it comes in also has the same luxe and classy looking rose gold and black colouring and detail. It is truly stunning and screams high end. So what is the Embellished Eye Trio exactly? What is it made up of I hear you ask?


(L-R: Brow Gel, Vintage Metallix, Gel Liner.)

Illamasqua Precision Brow Gel in Strike (RRP: £18.50).


Until I saw the Embelished Eye Trio, I had absolutely no idea that Illamasqua did brow gel – bad beauty blogger or what? Slap on the wrist for Erin. I am a massive fan of brow gel products and I did a massive squeal of excitement when I saw it. I couldn’t wait to have a little play around with it. If there is anything that us girls like to get right, it’s our eyebrows. The eyebrow game has got to be strong. I find gels to be the perfect eyebrow products to use as they are easy to work with, smudgeproof and they look extremely natural in comparison to powders and pencils. This offering from Illasmasqua is pretty darn special I must admit. The shade Strike which I received in the trio is a rich chocolate brown which is a great match for my natural eyebrow colour and it applied like a dream. It is very similar in texture to the much coveted Anastasia Dipbrow Pomade and it works just as well but it is much easier to get your hands on. I find the best results with this product when applying it with a small angled brush, working it through the eyebrows in small brush strokes. 

Illamasqua Vintage Metallix in Embellish (RRP: £16.50).


Another product that I love is cream eyeshadows… I can’t get enough and I must have all the colours. This trio is bringing great things so far, right? The Vintage Metallix were released as part of the ‘Once’ range a while back and they are utterly fabulous. Embellish is one of three Vintage Metallix shades and it is a wonderful metallic brown colour with small amounts of gold shimmer throughout which is right up my street. Out of the three shades available, this would have been the one I’d of picked for sure so I was quite happy to see it in the trio set. I like browns as they really make my blue peepers pop. The texture is super creamy and it applies wonderfully and blends amazingly well. I have been reaching for this daily ever since it landed on my doorstep. Embellish adds a beautiful wash of intensely pigmented colour across the eye lids. Embellish makes a lovely base to deepen and add more depth to powder eyeshadows as well as a gorgeous stand alone colour.

Illamasqua Precision Gel Liner in Infinity (RRP: £18.50).


When it comes to eye liner, particularly gel eye liner, Illamasqua have got it down with their Prescision Gel Liner in Infinity. It is my holy grail eye liner. It is intensely black (and I mean blacker than black), fully opaque in one quick flick and it doesn’t move an inch in any condition. I mean this stuff clings on to your eye lids for dear life. That is what we like to see right, girls? No one wants smudged and fading eye liner – that is not a look, ever. Teamed with an angled eye liner brush, this stuff creates the smoothest and most amazing feline flicks. I did a rave review of this product previously and you can read the full review here.


I absolutely love this Embellish Eye Trio set and I am so happy that I got my little mitts on it. I am really impressed with all of the products in this set – the quality, the colours, the pigmentation, the packaging and the staying power. What I like even more is that I managed to purchase it for half price.

SHOP ILLAMASQUA.

What do you think of Illamasqua’s Embellished Eye Trio?


Bloglovin’ | Twitter | Instagram | Pintrest | Google+

Urban Decay Vice 3 Palette.

IMG_2345
Urban Decay Vice 3 Palette – £42.00.

IMG_2348

IMG_2350

Yes, I know what you’re all thinking… I am extremely late to the party with this palette but you know what they say, better late than never. Right? In all honesty, I’ve been drooling over this palette for yonks (yes, I did just say yonks) and I don’t know why I didn’t take the plunge earlier. I mean who could resist that amazing striped design packaging and the truly gorgeous jewel embossed lettering across the front. Oh em gee – B.E.A.UTIFUL! I actually didn’t realise that I needed this palette until I was perusing Debenhams quite recently and took to swatching wild and then naturally, I couldn’t leave without it. In the bag. Urban Decay’s Vice 3 palette is composed of twenty brand spanking new, exclusive and utterly beautiful shades housed inside packaging that is just drop dead gorgeous. They really went all out inside the palette with a huge compact mirror – now that’s what I’m talking about ladies. Finally, a decent sized mirror for travelling. A few brands could do with a taking a leaf out of Urban Decay’s department on that front. Oh and did I mention that it comes with a handy travel wallet? No? Well, it does. Check this beauty out…

IMG_2352
Awesome, right?

Anyway, enough of the packaging talk. Let’s have a look at the eyeshadows inside this Vice 3 palette, packed with attitude, shall we??

IMG_2351
Top Row: Truth, Undone, Downfall, Dif.
Middle Row: Dragon, Freeze, Heroine, Brokedown.
Bottom Row: Vanity, Lucky, Reign, Bobby Dazzle.

IMG_2349
Top Row: Alien, Alchemy, Bondage, Sonic.
Bottom Row: Last Sin, Angel, Defy, Revolver.

Urban Decay have got the whole eyeshadow thing DOWN. Am I right or am I right? They have got the neutrals game strong in all three of the Naked palettes and now they’re bringing out the big guns in terms of colour in the Vice 3 palette and it works tremendously. Vice 3 offers everything from bright jewel colours like green and blue to rich browns, deep blacks and even a few softer neutrals. The quality, colour range and pigmentation is just spot on. Each of the twenty shades are buttery soft, silky smooth and easily blended together. They are a make up lovers dream I tell you. Some of the shades within the Vice 3 palette are a bit loosely packed so you will get a bit of powder kick up but hey, I can’t complain. This palette is great for those who are a bit wary when it comes to colour as it is the perfect way to incorporate some creativity in to your looks and experiment with colour. The column with the reds, pinks and purples is EVERYTHING – I am hooked. Urban Decay have also been kind enough to include a snazzy double ended brush to help us improve on our blending game. I love, love, love this palette. So much. 

20140228-093913 pm.jpg 

Twitter | Instagram | Tumblr | Pintrest | Google+ 

Follow on Bloglovin She Said Beauty

Lipstick Loveliness of the Week – MAC Brick-O-La.

IMG_2347
MAC Cosmetics Amplified Lipstick in Brick-O-La.
RRP: £15.50.

IMG_2346

It feels like a small eternity has passed since I last posted a ‘Lipstick Loveliness of the Week’ post and I’m here to put that right. This week, I have opted for a wonderful shade, perfect for the transitional period between Winter and Spring. I bring to you – Brick-O-La. It is described by MAC Cosmetics as a ‘mid-tone berry’ but it is a very subtle berry shade and quite pink toned with a lovely glossy sheen. Brick-O-La applies like an absolute dream with it being an amplified creme lipstick – it is completely opaque in one quick swoop over the lips and it offers zero tug with its beautifully creamy texture. I found the formula of this lipstick to be quite incredible – it didn’t dry out my lips at all and it wore really well for at least five hours or more. Like most MAC Cosmetics lipsticks, Brick-O-La offers amazing pigmentation and longevity which is one of the reasons that I’m always going back for more. I just can’t get enough of those little black and silver bullets. I really adore the colour of this lipstick so much – it is subtle enough for everyday wear at the office but would look fabulous with a smokey eye for a night out. It is super versatile. Brick-O-La is a newbie to my ever growing stash of lipsticks and I wish I’d purchased it a long time ago.

SHOP MAC COSMETICS.

What are your thoughts on Brick-O-La? What are your favourite transitional lipsticks, moving from Winter to Spring?

20140228-093913 pm.jpg
Twitter | Instagram | Tumblr | Pintrest | Google+
Follow on Bloglovin
She Said Beauty